A concert scrapbook combines the physical proof (tickets, wristbands, photos) with written memories that give them meaning. Without context, a ticket stub is just a piece of paper. With a few sentences about the night, it becomes a time machine.
The good news: you don't need to be crafty. The best concert scrapbooks are simple, consistent, and actually get made. Perfectionism kills more scrapbooks than bad design ever could.
What to Include in a Concert Scrapbook
Start with what you already have. Most concert-goers accumulate memorabilia without trying.
Tickets and stubs - Physical tickets, printed confirmations, or screenshots of digital tickets. Even a phone screenshot printed on regular paper counts. Missing a physical ticket? Generate a custom concert ticket for any show to include in your scrapbook.

Wristbands - Fabric, plastic, or paper. These flatten well and add color to pages.
Photos - Printed from your phone, Polaroids, or photo booth strips from the venue. Even blurry concert photos work because they capture the atmosphere.

Setlists - Handwritten copies, screenshots from setlist.fm, or (if you're lucky) the actual paper setlist from the stage.
Posters and flyers - Handbills from the venue, tour posters, or promotional materials. These often need to be folded or trimmed to fit.

Merch tags and receipts - The tag from a tour shirt, a receipt showing what you bought, or the paper bag the merch came in.
Confetti and paper scraps - Some shows drop confetti, streamers, or printed materials during the performance. These add texture and color.

Written memories - The most important element. Who you went with, what you felt, what surprised you, what you'll remember. Without this, you just have a box of stuff.
Concert Scrapbook Ideas
Not sure where to start? Here are approaches that work.
The Chronological Archive
Document shows in order as you attend them. One page or spread per concert, moving through time. This creates a visual timeline of your concert life and makes it easy to add new shows.
Best for: People who want a complete record and will add entries consistently.
The Artist Tribute
Dedicate sections to specific artists. All your Taylor Swift shows together, all your Foo Fighters shows together. Include ticket stubs, photos, and notes about how your relationship with the artist evolved.
Best for: Fans with deep loyalty to specific artists they've seen multiple times.
The Venue Collection
Organize by venue instead of artist. Your local club gets a section, the arena across town gets another. This highlights how different spaces shape the concert experience.
Best for: People who attend shows at the same venues repeatedly and appreciate the venue as part of the experience.
The Highlight Reel
Skip completeness. Only include shows that genuinely mattered. First concerts, life-changing performances, shows with significant personal meaning. Quality over quantity.
Best for: People who've been to hundreds of shows and don't want to document all of them.
The Festival Spread
Dedicate multiple pages to multi-day festivals. Include the lineup poster, daily schedules, wristbands, and notes on each act you saw. Festivals generate enough memorabilia for their own mini-scrapbook.
Best for: Festival-goers who want to capture the full experience of a weekend.
The Decade Book
One scrapbook per decade of concert-going. Your 2010s book, your 2020s book. This creates natural volumes and prevents any single book from becoming overwhelming.
Best for: Long-time concert-goers with extensive history to document.
Concert Scrapbook Layouts
The layout determines how your pages look and feel. Here are templates that work for concert memorabilia.
The Classic Spread (Two Pages Per Show)
Left page: Ticket stub centered, date and venue written above, artist name as header.
Right page: Photo (or photos), written memories below. Who you went with, one highlight, how you felt leaving.
This is the most common layout because it works. Enough space for memorabilia and writing without feeling cluttered.
The Quick Log (One Page Per Show)
Top third: Ticket or wristband attached.
Middle third: Basic info (artist, venue, date, who you went with).
Bottom third: One sentence about the night.
Good for people with lots of shows to document who want to move quickly.
Concert Ticket Scrapbook Layout
For pages focused specifically on ticket stubs:
Grid layout: 4-6 tickets per page in a grid pattern, with small labels beneath each (date, artist).
Timeline layout: Tickets arranged chronologically down the page with a vertical line connecting them.
Collage layout: Tickets overlapping at angles, filling the page with color and text.
Ticket-focused layouts work well when you have years of stubs to organize but limited photos or other memorabilia.
The Full Bleed Photo Page
One large photo taking up most of the page. Ticket stub in the corner. Caption at the bottom with date, artist, venue.
Works best when you have a genuinely great concert photo worth featuring.
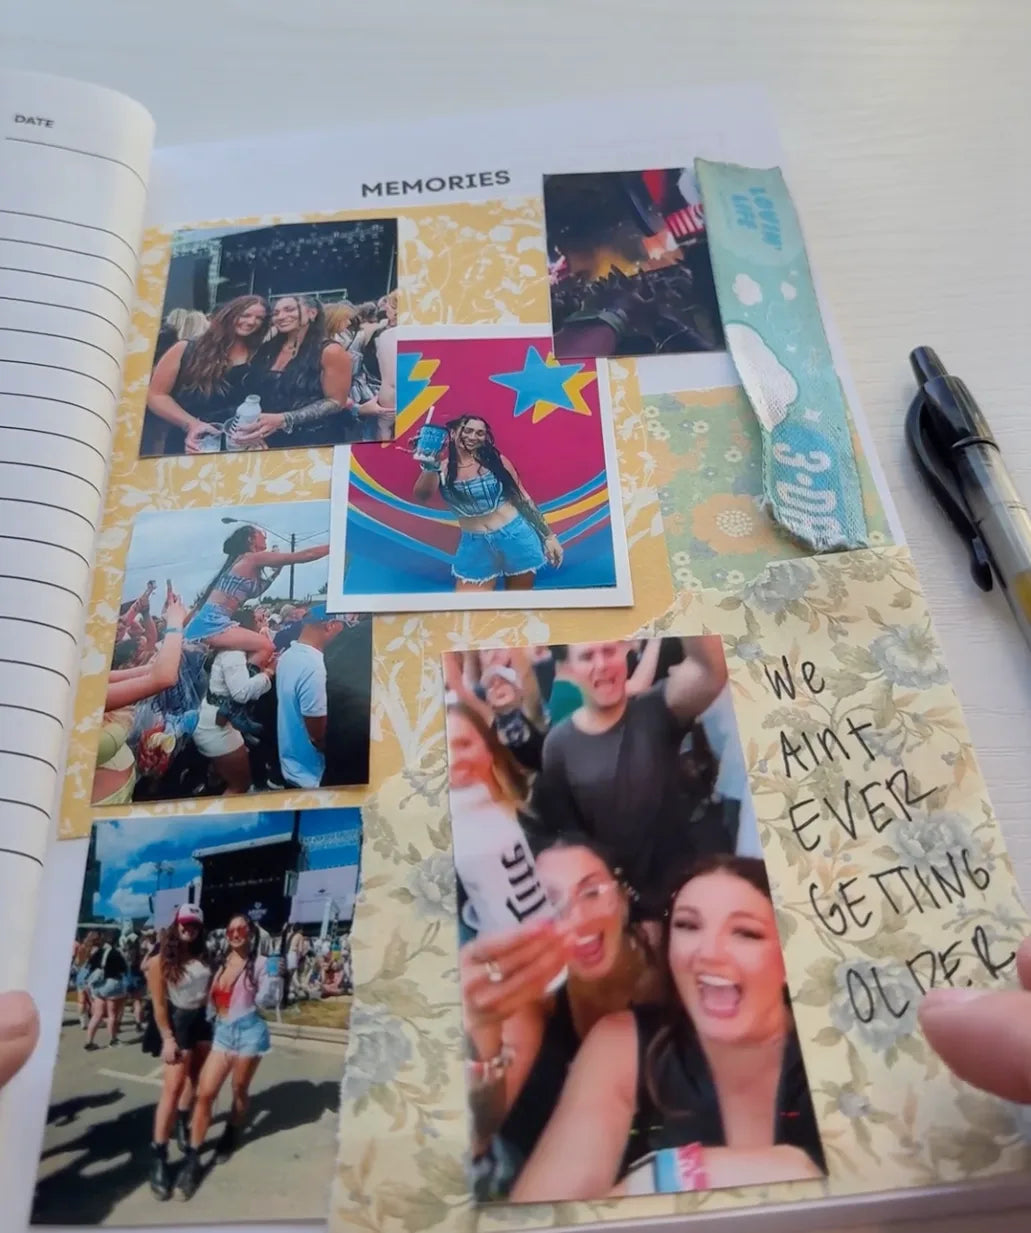
The Memorabilia Collage
Multiple items layered and overlapping: ticket, wristband, photo, confetti, setlist snippet. Organized chaos that captures the sensory overload of a great show.
Good for festivals or shows where you collected a lot of physical items.
Supplies and Paper for Concert Scrapbooks
You don't need expensive supplies, but the right materials make a difference.
The Scrapbook Itself
Blank scrapbook or album ($15-40) - Look for one with thick pages that can handle glued items. 12x12 inch is standard, but 8.5x11 works fine and is easier to store.
Three-ring binder with page protectors ($10-20) - Flexible and expandable. You can rearrange pages and add more as needed.
Art journal or sketchbook ($10-25) - Heavier paper weight handles glue and tape better than standard notebooks.
Concert journal that has memory pages ($20) - Some journals have dedicated space for scrapbooking inside.
Adhesives
Washi tape - The MVP of concert scrapbooking. Decorative, repositionable, and won't damage items. Use it to attach tickets, create borders, or add color. Comes in hundreds of patterns including music-themed options.
Acid-free photo corners - For attaching items without glue touching them directly. Good for valuable tickets you might want to remove later.
Acid-free glue stick - For permanent attachment. Make sure it's acid-free to prevent yellowing over time.
Double-sided tape - Clean attachment without visible adhesive. Good for photos and flat items.
Avoid: Regular tape (yellows and peels), rubber cement (damages paper), hot glue (too permanent and messy).

Protective Materials
Acid-free paper - For backgrounds and mounting. Regular paper contains acid that causes yellowing and deterioration over time.
Page protectors - Clear sleeves that go over finished pages. Prevents smudging and protects memorabilia.
Acid-free sleeves - Small pockets for individual tickets or photos. Good for items you want to keep removable.
Decoration (Optional)
Stickers - Music-themed stickers add personality. The Concert Sticker Pack includes designs made for concert documentation.

Markers and pens - For writing captions, drawings, and labels. Archival-quality pens won't fade over time.


Stamps - Date stamps, music symbols, or custom stamps with your name.
Printed elements - Setlists printed from setlist.fm, maps of venue locations, screenshots of social media posts from the night.
Flair - Add jewels or other decorative items to make your scrapbook shine.

Preservation Tips
Concert memorabilia degrades over time. A few precautions keep your scrapbook intact for decades.
Use acid-free everything. Acid in paper and adhesives causes yellowing, brittleness, and deterioration. Acid-free materials cost slightly more but last dramatically longer.
Avoid rubber bands and paper clips. Rubber bands dry out and stick to paper. Paper clips rust and leave marks. Use acid-free sleeves or washi tape instead.
Store flat in a cool, dry place. Heat and humidity accelerate deterioration. A bookshelf in a climate-controlled room beats a box in the garage.
Keep away from direct sunlight. UV light fades ink and paper. If you display your scrapbook, rotate which pages face outward.
Handle thermal tickets carefully. Many modern tickets are printed on thermal paper that fades over time regardless of storage. Consider photocopying or scanning thermal tickets as backup.
For detailed guidance on ticket preservation specifically, see The Complete Guide to Preserving Concert Tickets.
Physical vs. Hybrid Approach
Some fans go fully physical with memorabilia and handwriting. Others print photos from their phone and combine with physical items. Both work.
Fully physical: Everything handwritten, photos printed at a drugstore or on a home printer, no digital elements. Creates the most tactile, artifact-like result.
Hybrid: Digital photos printed and combined with physical tickets and wristbands. Setlists printed from setlist.fm. Social media posts screenshotted and included. Easier to execute and fills gaps when physical memorabilia is limited.
Digital backup: Even if your scrapbook is physical, consider photographing or scanning finished pages. If something happens to the physical book, you still have the memories.
Start Simple
A basic notebook with ticket stubs and one sentence per show is better than a perfect scrapbook you never start.
The enemy of concert documentation isn't bad design. It's waiting until you have time to do it "right." Start with what you have, add to it when you can, and accept that imperfect pages are infinitely better than empty ones.
If the DIY approach feels like too much, the Concerts Remembered Journal provides structure without requiring craft supplies. Prompts guide what to write, pockets hold memorabilia, and the format is designed to actually get used.
FAQ
What should I put in a concert scrapbook?
Tickets, wristbands, photos, setlists, posters, confetti, merch tags, and written memories. The written part matters most. Without context about who you went with and how you felt, the physical items are just paper and plastic.
How do I organize a concert scrapbook?
Most people organize chronologically (one page per show in order) or by artist (all shows for one artist grouped together). Choose based on whether you care more about your timeline or your relationship with specific artists.
What's the best way to attach ticket stubs?
Washi tape is the most versatile option. It's decorative, repositionable, and won't damage the ticket. Acid-free photo corners work if you want to keep tickets removable. Avoid regular tape, which yellows and peels over time.
How do I preserve old concert tickets in a scrapbook?
Use acid-free materials for everything: paper, adhesives, and page protectors. Store the scrapbook flat in a cool, dry place away from direct sunlight. For thermal tickets that are already fading, scan or photocopy them as backup before the print disappears completely.
What size scrapbook should I use for concerts?
12x12 inch is standard and gives plenty of room for memorabilia. 8.5x11 inch is easier to store and still accommodates most items. Choose based on how much space you need and where you'll keep the finished book.
Can I make a concert scrapbook digitally?
Yes. Apps like Canva, Adobe Spark, or dedicated scrapbooking software let you create digital pages with photos and text. You can print these as a photo book or keep them digital. The tradeoff: you lose the tactile element of physical memorabilia.
How do I scrapbook concerts I attended years ago?
Start with what you can find: old photos, ticket stubs in drawers, emails with ticket confirmations, social media posts from the date. Use setlist.fm to find setlists. Write what you remember, even if details are fuzzy. Partial documentation beats no documentation.
What's the difference between a concert scrapbook and a concert journal?
A scrapbook emphasizes visual elements and memorabilia (tickets, photos, stickers). A journal emphasizes written reflection (prompts, ratings, memories). Many concert journals include pockets for memorabilia, blurring the line. Choose based on whether you prefer crafting or writing.
Skip the DIY
The Concerts Remembered Journal is a concert scrapbook with structure already built in. Prompts tell you what to write, pockets hold your tickets and memorabilia, and the format is designed to actually get used.
→ Shop the Concert Journal
Share: